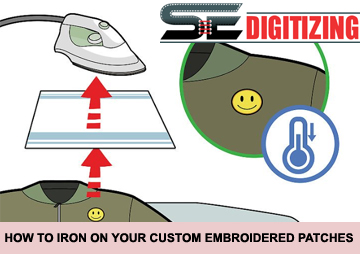
If you’re like me, you love to wear patches on your clothes. It can be really fun to add a little personality to your outfit and make it more personal than just plain old jeans and T-shirts. But there are some steps involved in making sure that you get the most out of your embroidered patch. In this article, I’ll show you how easy it is to iron an embroidered patch on your clothing so that it stays firmly attached!
Materials You Will Need
You will need the following materials:
- You can buy an ironing board and iron, but if you have one already, all you need is some water and steam!
- It’s best if they are sharp so that they don’t fray the fabric of your patch while cutting it out.
- Paper towels or paper plates because they’ll help to keep things clean while doing this step (and also so that you don’t get any iron-on patches stuck on your hands).
- Safety first: Prepare the ironing board.
Before you begin ironing, make sure your ironing board is clean and flat. It’s important to keep the surface of your ironing board clean, so it doesn’t get any wrinkles in the fabric when it’s pressed. If you don’t have an ironing board, then use a piece of cardboard or something similar instead! This will help prevent damage from happening to your custom patches and patchwork quilts.
Separate Your Patch From the Backing
- Use a seam ripper to separate the backing from the patch.
- Scissors can also be used, but they’re not as good at getting the edge of the material.
- A hobby knife will do just fine if you don’t have any other tools on hand.
If you don’t want to spend any money on tools, there are plenty of paper cutters made specifically for cutting embroidery threads out of cloth (and they come in handy when making crafts).
Let your patch go on vacation for 15 minutes.
When you are ironing on your printed patches, it’s best to let them cool down a bit. This is because the heat of your iron can make the glue too hot, which could cause any imperfections in the stitching to show up. You can do this by putting your patch in a bowl of cold water and letting it sit there for several minutes (or until it feels cooler). Or you can put them in the freezer for 15 minutes if that’s more convenient for you!
Put your patch in place.
Now that you have your patch in place, it’s time to iron. You want to make sure that the patch is not too small or too large, so measure it and make sure it’s not too close to the edge of your garment. If you’re using an embroidered patch rather than applique, be sure that your ironing board isn’t warped—you’ll want an even temperature across all surfaces of your garment when applying heat!
Finally: turn on your ironing board and wait for steam!
- Set your iron to the right setting
- To get the most out of your iron, you’ll need to set it at the right temperature. This can be tricky because there are so many different brands and models, but generally speaking:
- If you have an iron with a digital display (such as a Bosch), press “cotton” on this screen.
- If your iron has no digital display or doesn’t have one that shows what setting you’re currently using, just make sure that it’s turned off before proceeding with patching—you don’t want any steam escaping from inside!
Iron your patch, do not move it around.
If you want to iron a patch that has been embossed on it, you will need to iron it in one place. This can be difficult if the patch has been placed somewhere else before being embroidered. If this is the case, we advise against moving your iron around in order to avoid damaging your custom-designed printed material or causing any tears or holes in your newly designed patch!
Let the patch cool down a bit and check if it is properly attached.
Once the patch is cool enough to touch, you can check if it’s properly attached. To do this, hold the iron on its highest setting and press slightly above where you want to apply your new patch. If there are any bubbles or gaps around where the patch should be, use a needle to push them out gently; if not enough heat has been applied for good adhesion (the fabric should feel warm), repeat steps 1-4 until everything feels right!
Now you have a great piece of clothing with your own unique embroidered patch!
Now that you have ironed your patch onto your clothing and are ready to wear it proudly, it’s time for the next step: show off! You can now go out in public and show off this great addition to your wardrobe.
Advantages of sticking embroidered patches properly
Sticking embroidered or custom leather patches properly to your clothes is important for a number of reasons.
First, it ensures that the patch won’t come off the garment in the wash or when you’re doing laundry. If it does, you’ll be left with a hole in your favorite outfit and no easy way to fix it.
Second, it keeps them from moving around as much so they don’t end up looking like they’re crooked or just not right where you want them to be.
Third, sticking them on right will make them last longer—and look better—than if you just try to glue them down or sew them on by hand (which can also lead to holes in your clothes).
Conclusion:
Congratulations, you have just learned how to iron on a patch! This is a great skill that can be used in many different ways, and it is fun to see how creative people get when they put their own creative touches on something. You can use your newly acquired skills with any type of fabric or material you like, whether it be denim jeans or leather jackets.